谷歌 OAuth2 与 Grails 3 和 Spring Security REST
了解如何将谷歌 OAuth2 与 Grails 3 和 Spring Security REST 插件一起使用
作者: 本·莱茵
Grails 版本 3.3.2
1 入门
在本指南中,我们将向您展示如何使用 Spring Security Rest 插件将谷歌 OAuth2 验证添加到您的应用程序中。
我们将使用 Spring Security Rest 插件
1.1 您需要什么
要完成本指南,您需要以下内容
-
一些时间
-
一个不错的文本编辑器或 IDE
-
安装了 JDK 1.8 或更高版本并正确配置了
JAVA_HOME
1.2 如何完成指南
要开始,请执行以下操作
-
下载源文件并解压缩
或
-
克隆 Git 代码库
git clone https://github.com/grails-guides/grails-oauth-google.git
Grails 指南代码库包含两个文件夹
-
initial初始项目。通常是一个简单的 Grails 应用程序,其中包含一些附加代码,以便让您赢在起跑线上。 -
complete完成的示例。它是完成指南中介绍的步骤并对initial文件夹应用这些更改的结果。
要完成指南,请转至 initial 文件夹
-
cd到grails-guides/grails-oauth-google/initial
并按照下一部分中的说明进行操作。
如果将 cd 进入 grails-guides/grails-oauth-google/complete,则可以直接转到已完成的示例。 |
如果想要从头开始,请使用 Grails Application Forge 创建新的 Grails 3 应用程序。
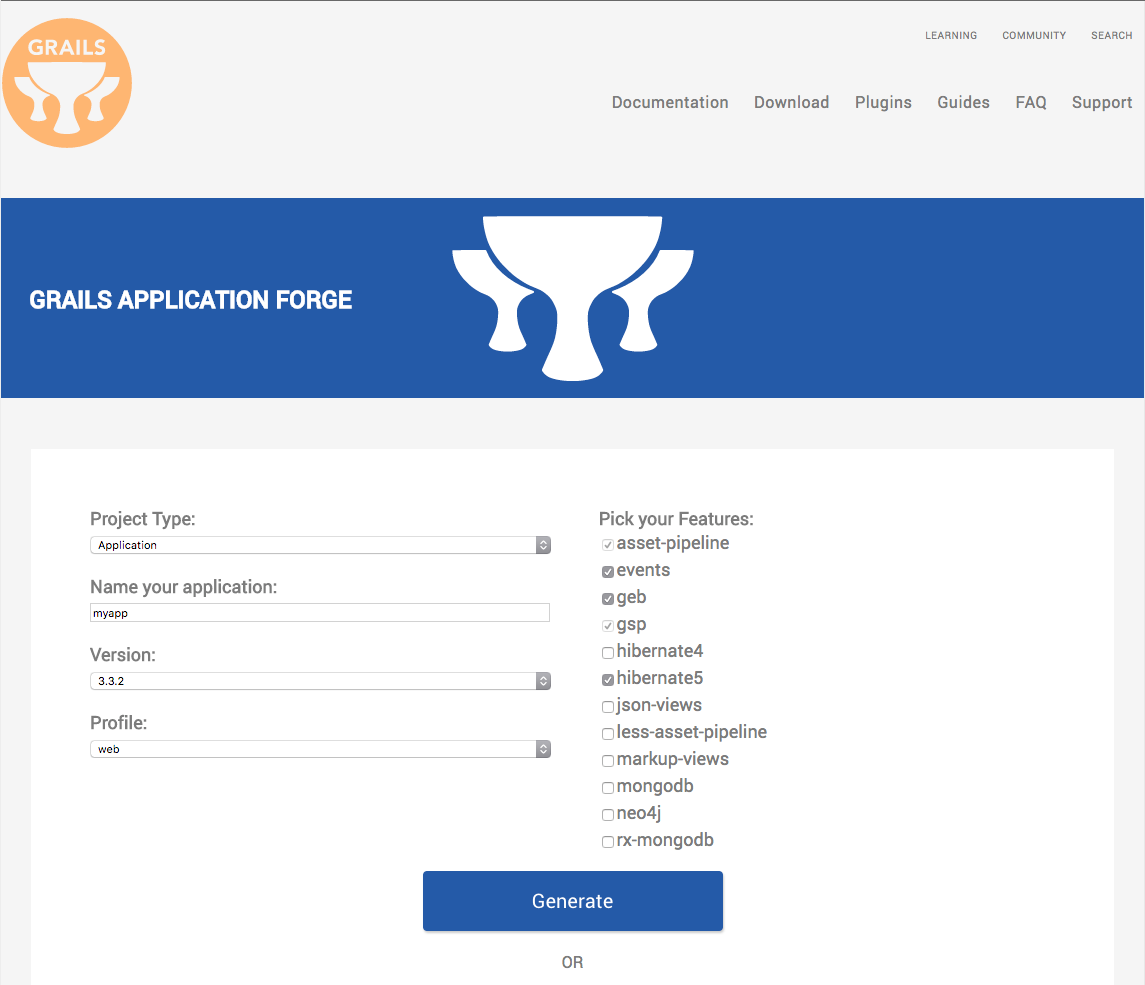
2 OAuth2 身份认证
OAuth2 是一个行业标准身份认证协议,许多财富 500 强公司都使用该协议来保护网站和应用程序。其工作机制允许第三方授权服务器通过帐户所有者批准访问权限来发布访问令牌。在本例中,我们将使用 Google,所以用更通俗的话来说,Google 用户批准其帐户向请求的应用程序发布访问令牌。
2.1 设置并配置 Google OAuth2
要在应用程序上启动并运行 Google OAuth2,需要在 Google Developer Console 上进行一些工作和配置。
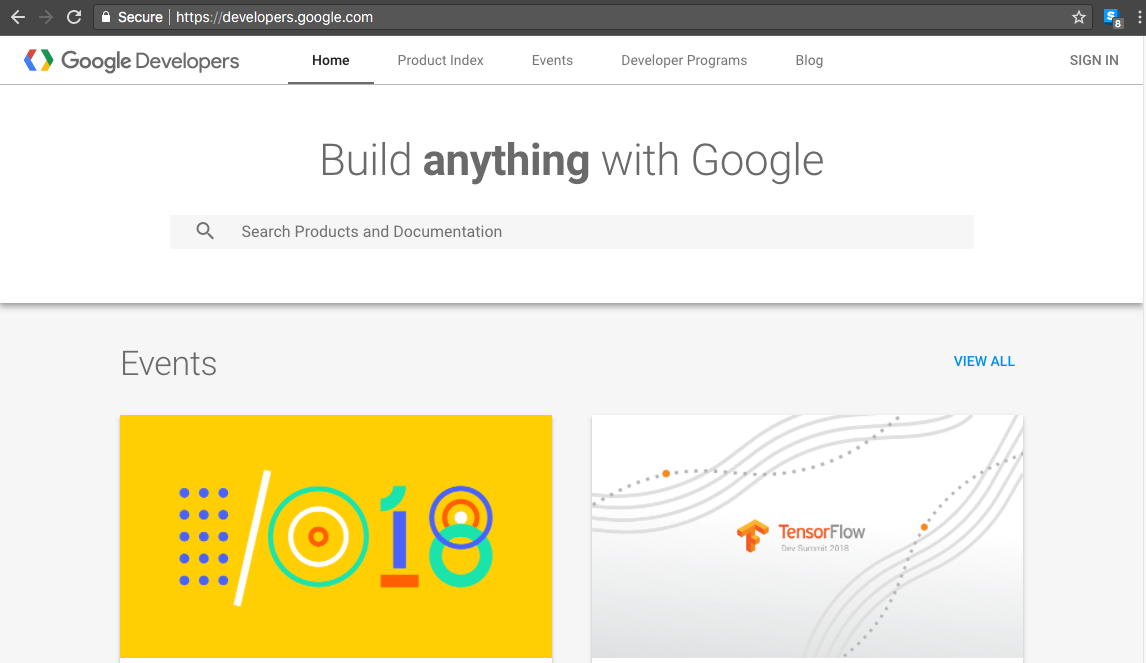
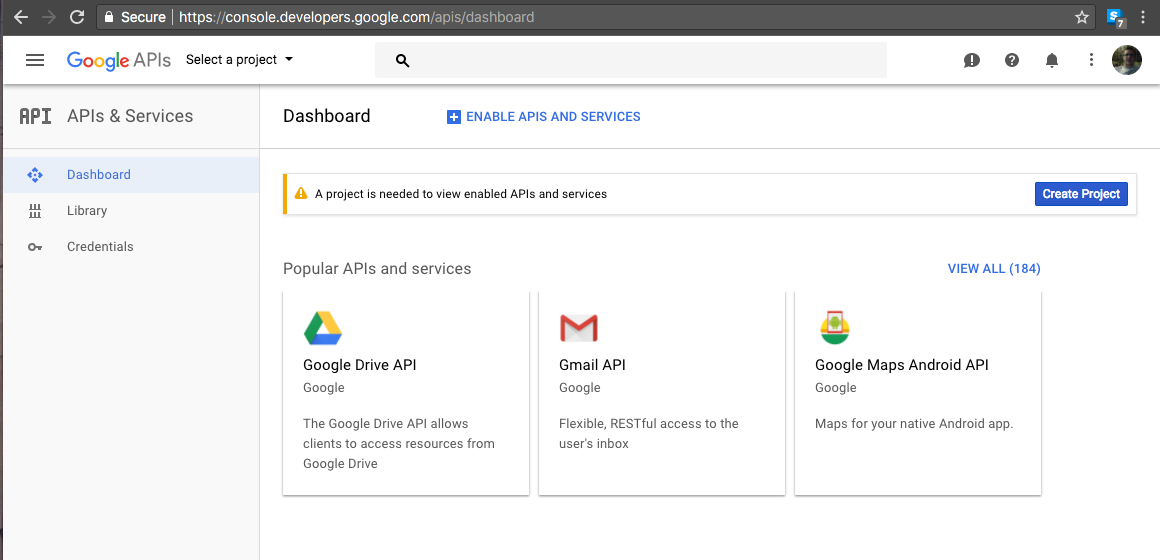
继续并登录,然后滚动到页面底部以选择 Google API 控制台。
选择创建项目
为你的 Google 项目取个名字。在本例中,我们将其命名为 Oauth-Test。
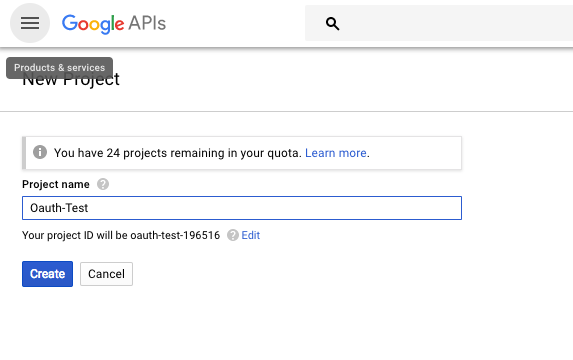
等待片刻,Google 会创建你的新项目。
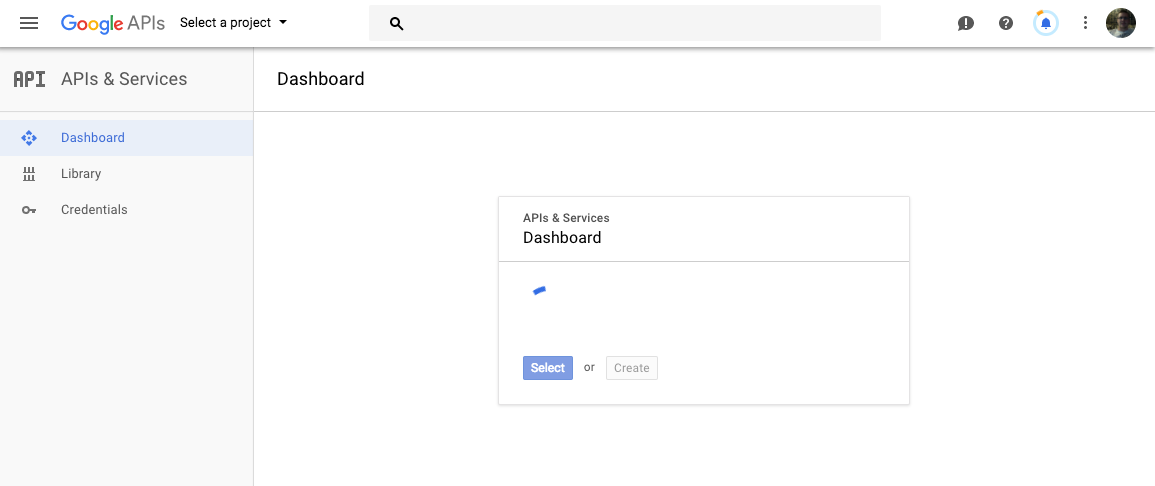
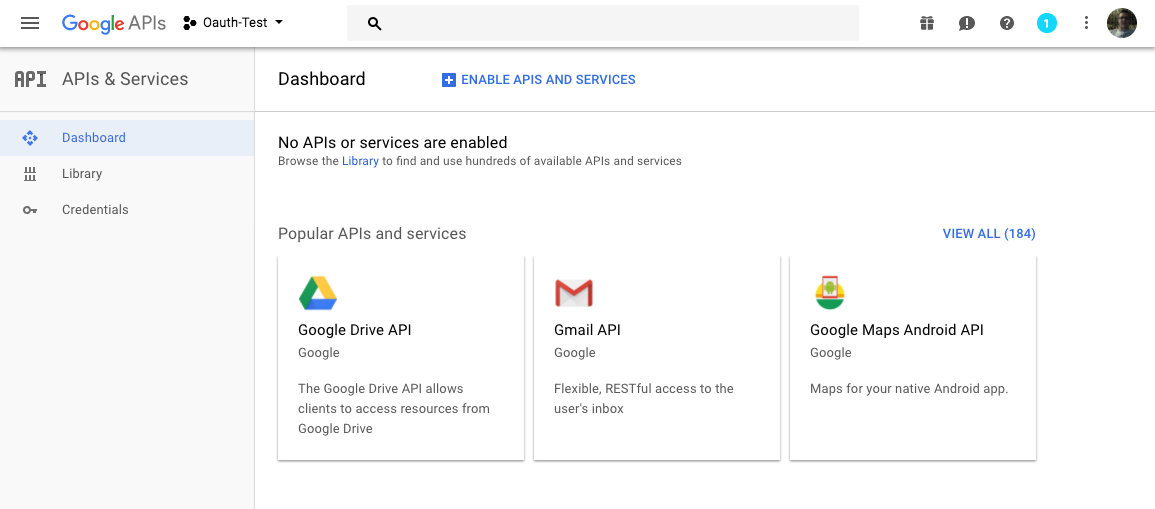
选择启用 API 和服务
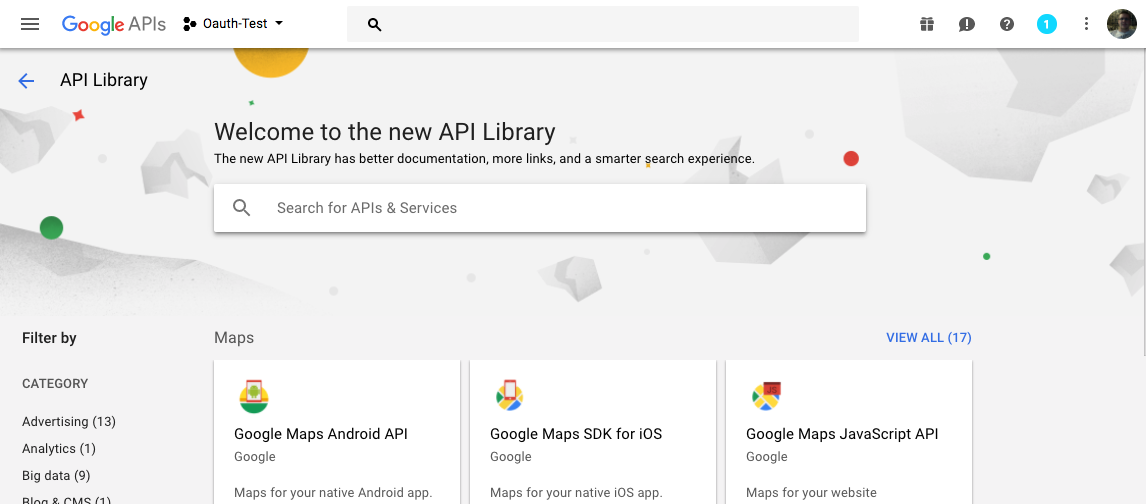
在搜索屏幕上搜索 google+
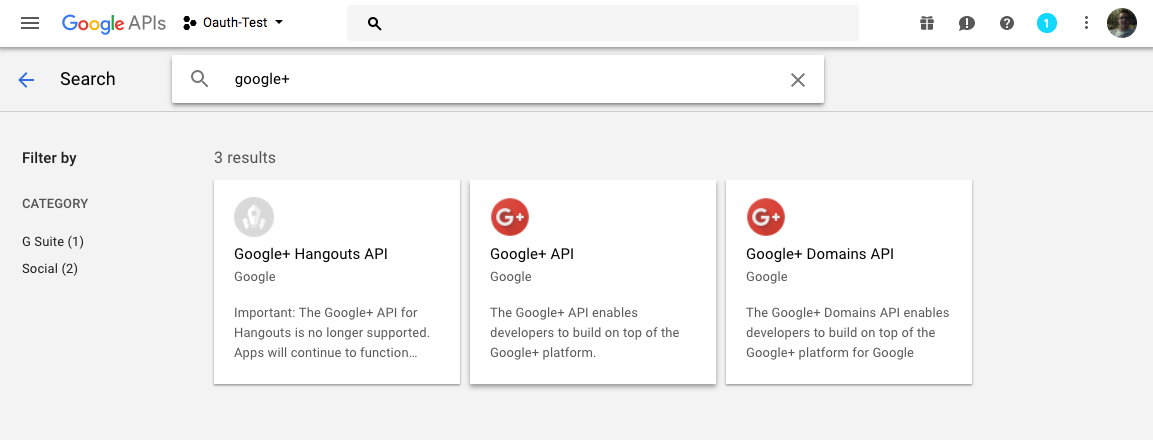
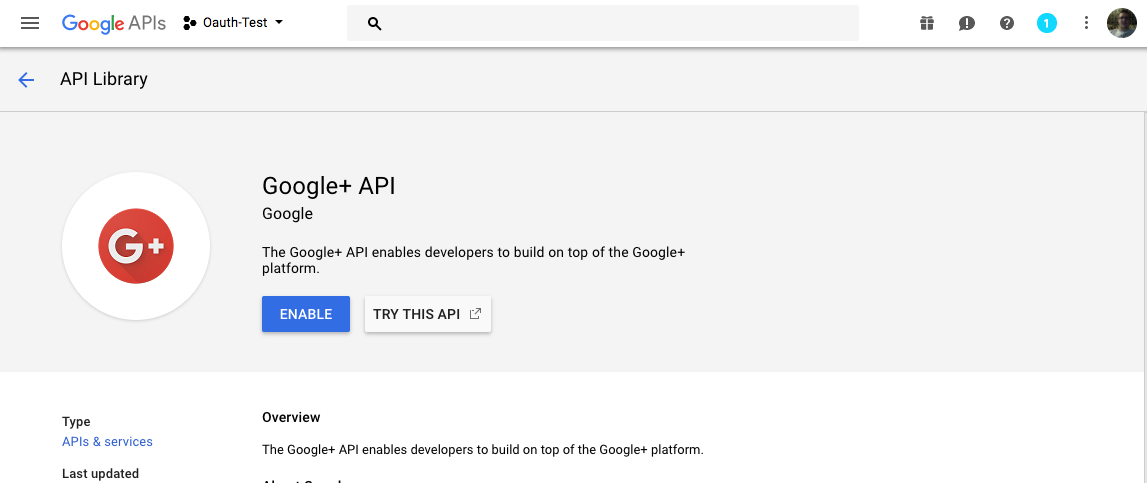
选择Google+ API
点击启用并等待片刻后,它将打开。
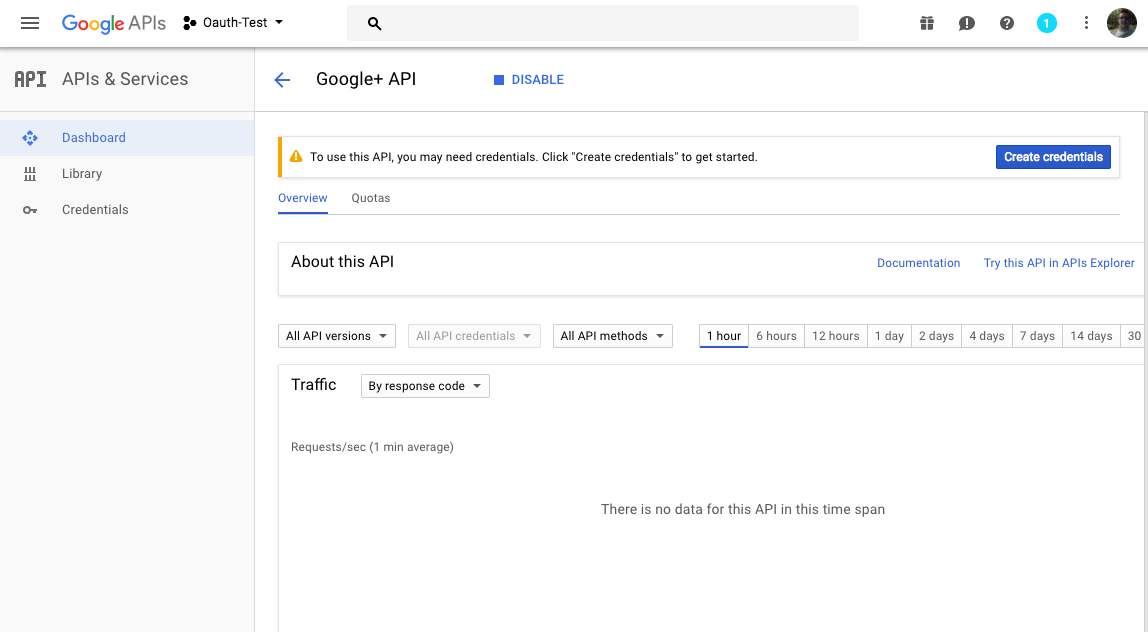
现在回到信息中心,单击创建证书
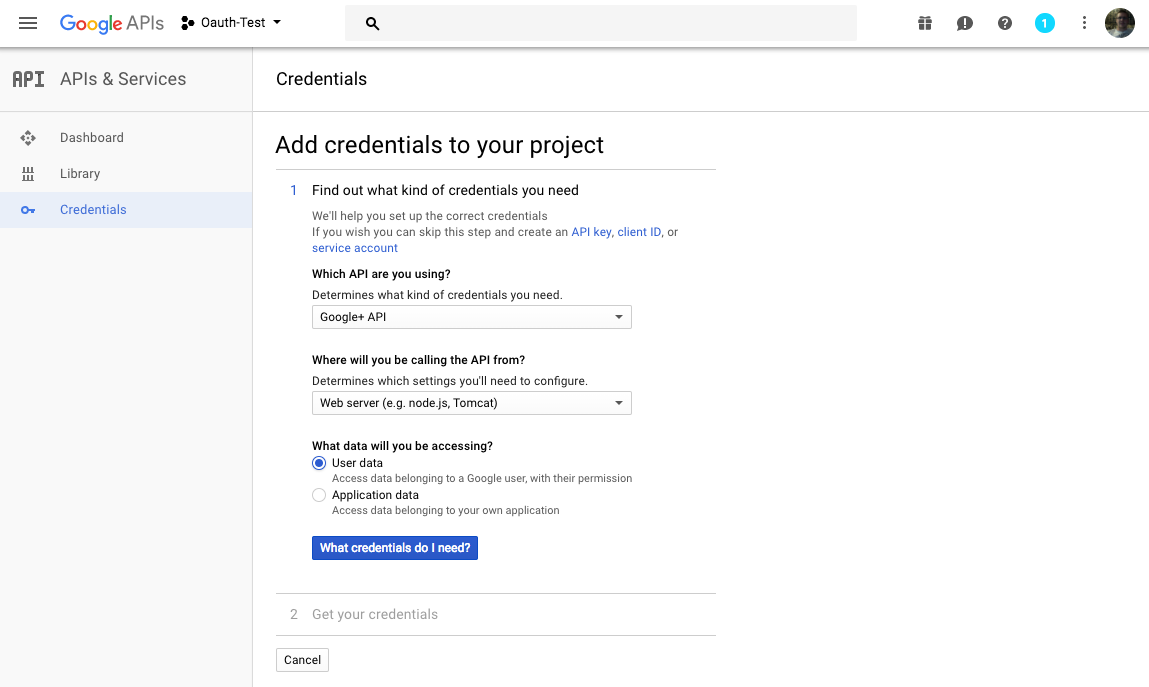
步骤 1:确保选择Google+ API,并勾选Web 服务器选项和用户数据,然后单击我需要哪些证书?。
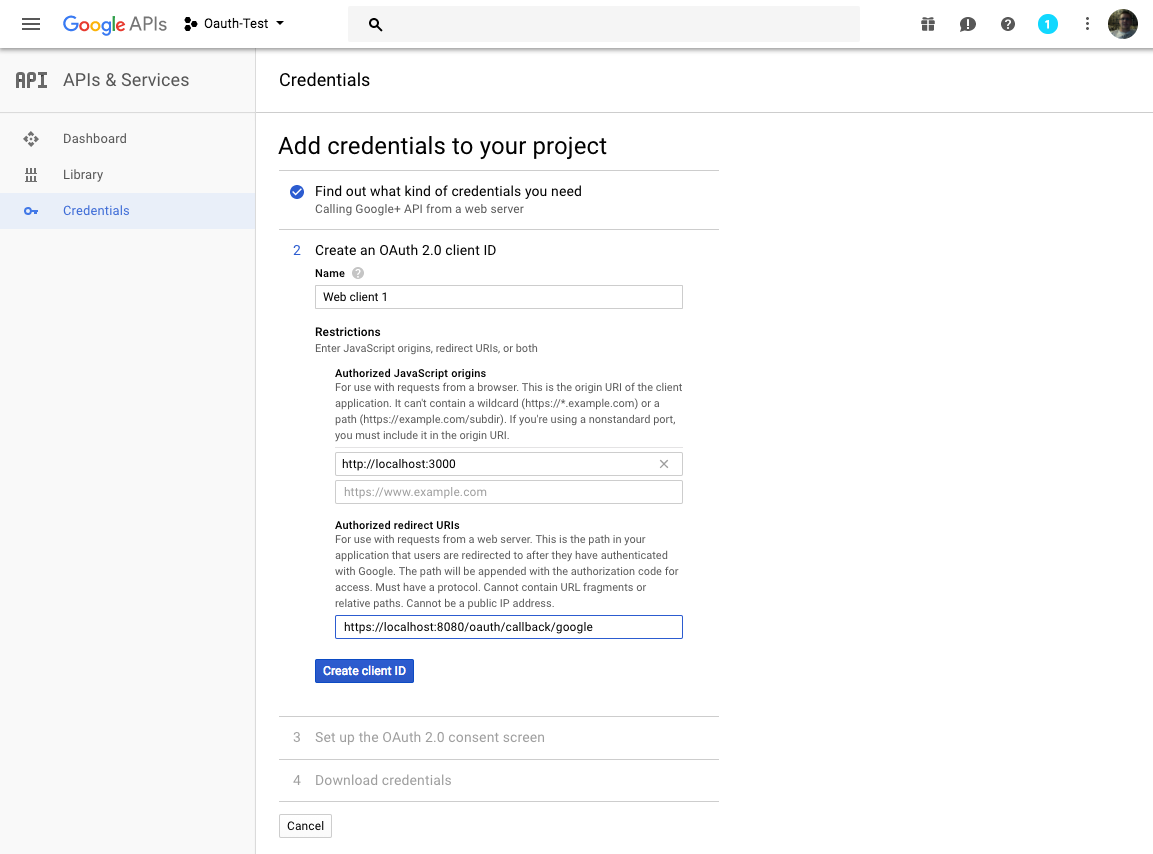
步骤 2:输入你选定的名字或保留默认值,设置你的前端 URL 和插件 oauth/callback/google 的 URL,然后点击创建客户端 ID。
步骤 3:选择你的 Gmail,并为该产品取一个名字,以便用户知道他们要身份验证进入的内容。点击继续。
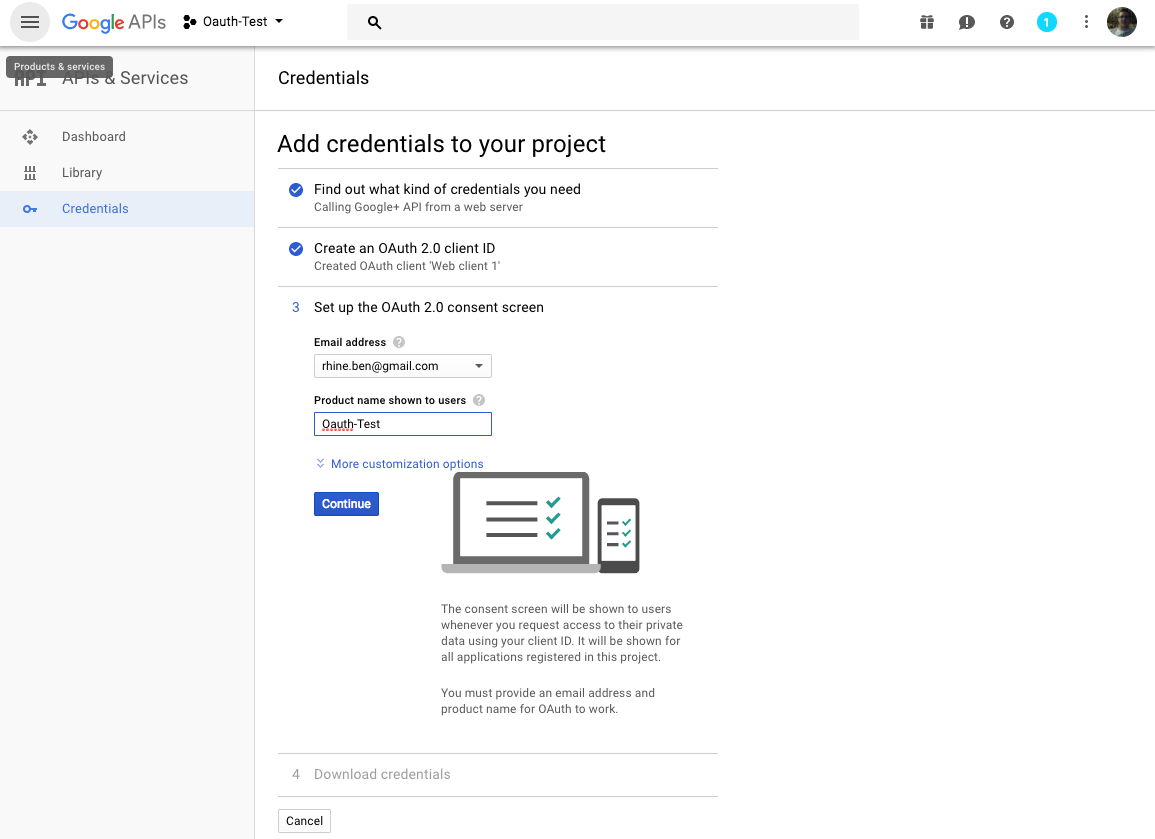
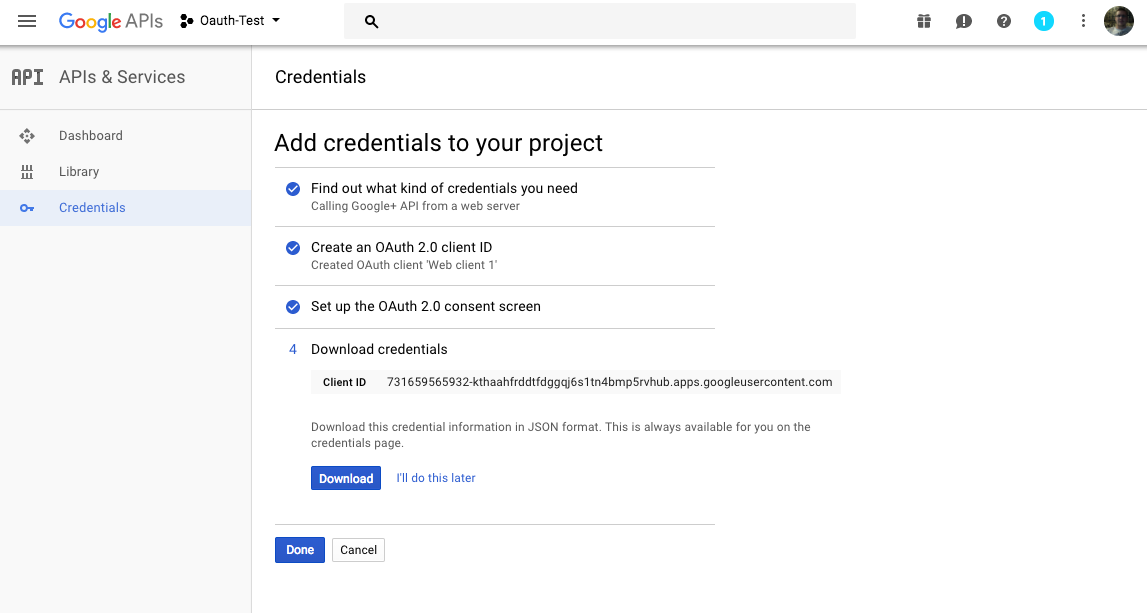
步骤 4:下载你的证书 JSON,然后单击完成。
这会将你带回到证书主页。
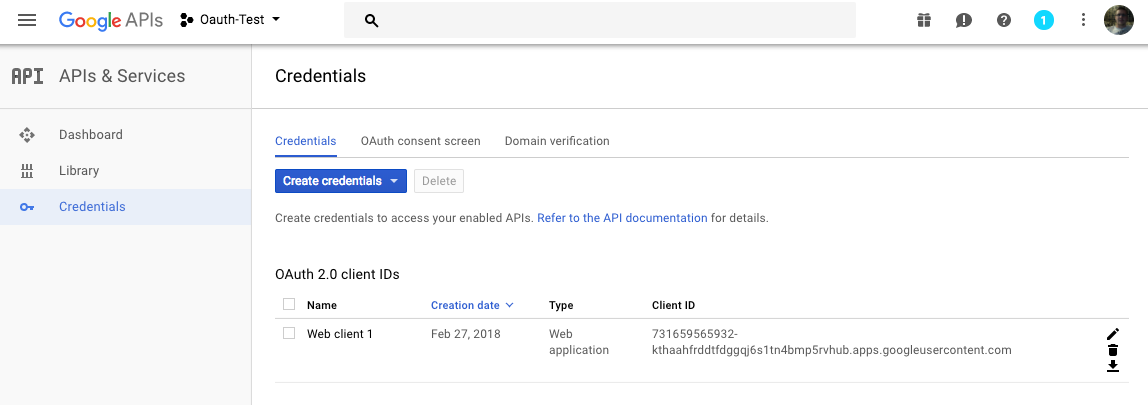
这些就是需要在 Google 中进行的所有设置。现在,我们将研究如何设置应用程序和下载的证书,以通过 Google 连接我们的应用程序。
3 设置你的应用程序
在所有 Google 配置都已就位的情况下,现在是时候配置我们的应用程序以使用安全性,并使用 Google 通过 REST 连接 OAuth2。
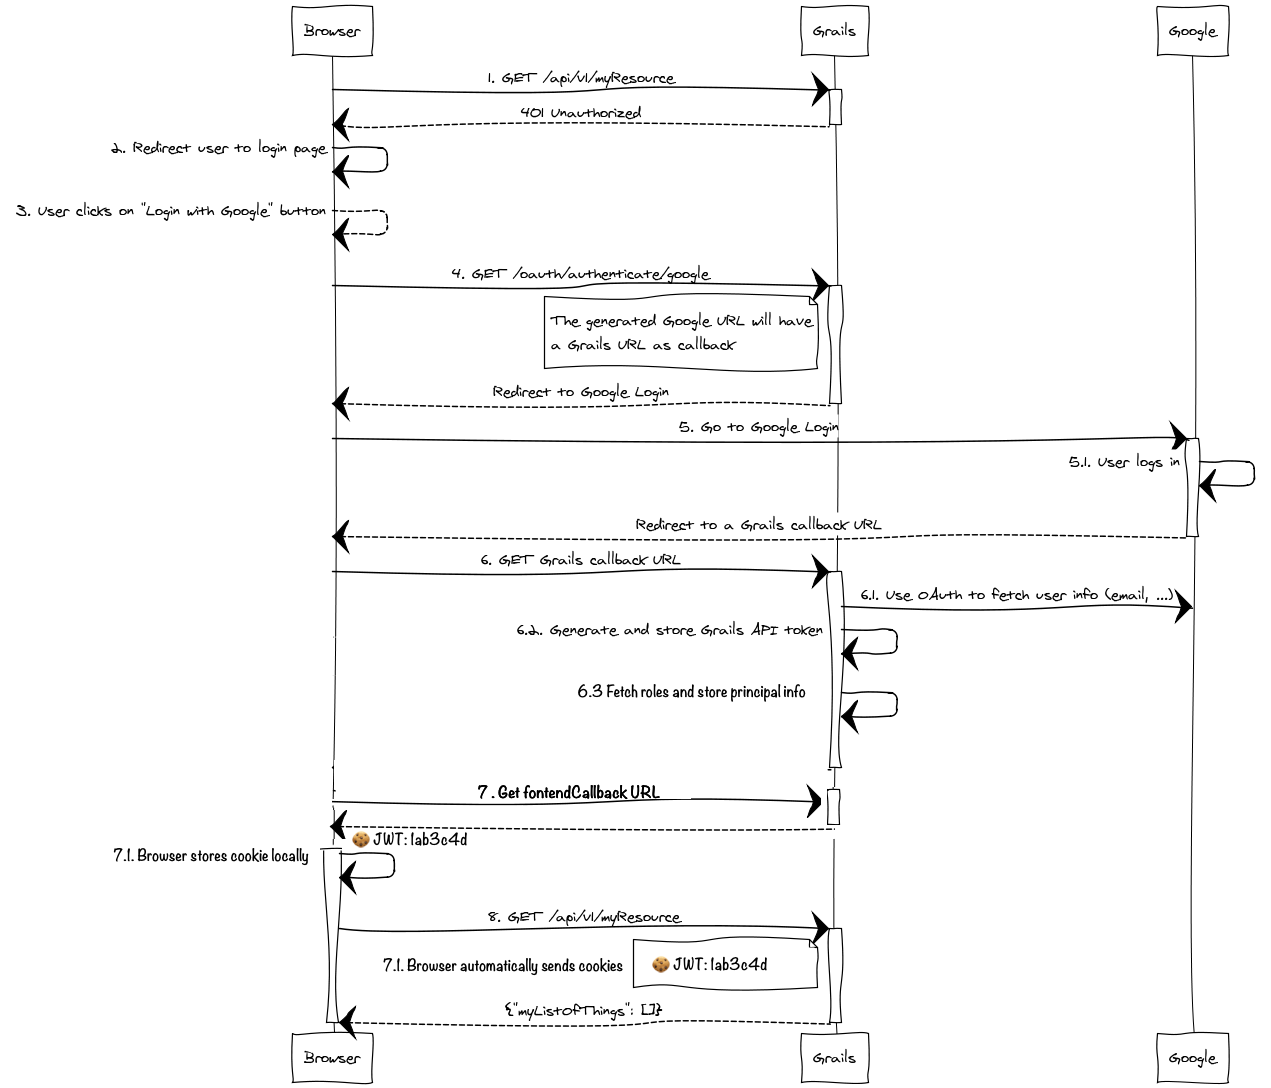
下一张图表描述了我们将要实施的安全解决方案。
3.1 添加安全依赖
我们需要做的第一件事是将 spring-security-core 和 spring-security-rest 插件添加到我们的 build.gradle 文件中。
compile 'org.grails.plugins:spring-security-core:3.2.1'
compile 'org.grails.plugins:spring-security-rest:2.0.0.RC1'
3.2 自定义令牌读取器
我们覆盖默认令牌读取器,以从 cookie 中读取 JWT 令牌。
实现 TokenReader
package demo

import grails.plugin.springsecurity.rest.token.AccessToken
import grails.plugin.springsecurity.rest.token.reader.TokenReader
import groovy.transform.CompileStatic
import groovy.util.logging.Slf4j

import javax.servlet.http.Cookie
import javax.servlet.http.HttpServletRequest

@Slf4j
@CompileStatic
class JwtCookieTokenReader implements TokenReader {

    final static String DEFAULT_COOKIE_NAME = 'JWT'

    String cookieName = DEFAULT_COOKIE_NAME

    @Override
    AccessToken findToken(HttpServletRequest request) {

        log.debug "Looking for jwt token in a cookie named {}", cookieName
        String tokenValue = null
        Cookie cookie = request.getCookies()?.find { Cookie cookie -> cookie.name.equalsIgnoreCase(cookieName) }

        if ( cookie ) {
            tokenValue = cookie.value
        }

        log.debug "Token: ${tokenValue}"
        return tokenValue ? new AccessToken(tokenValue) : null

    }
}
在 grails-app/conf/spring/resources.groovy 中将其注册为 tokenReader。
import demo.JwtCookieTokenReader
beans {
    tokenReader(JwtCookieTokenReader) {
        cookieName = 'jwt'
    }
...
..
.
}
3.3 配置安全
添加依赖后我们需配置安全性。
使用以下内容 staticRules 配置创建一个 application.groovy 文件。
grails.plugin.springsecurity.controllerAnnotations.staticRules = [
        [pattern: '/',               access: ['permitAll']],
        [pattern: '/error',          access: ['permitAll']],
        [pattern: '/index',          access: ['permitAll']],
        [pattern: '/index.gsp',      access: ['permitAll']],
        [pattern: '/shutdown',       access: ['permitAll']],
        [pattern: '/assets/**',      access: ['permitAll']],
        [pattern: '/**/js/**',       access: ['permitAll']],
        [pattern: '/**/css/**',      access: ['permitAll']],
        [pattern: '/**/images/**',   access: ['permitAll']],
        [pattern: '/**/favicon.ico', access: ['permitAll']]
]
添加如下语句块来配置 Grails Spring Security Rest 插件
grails {
        plugin {
                springsecurity {
                        rest {
                                token {
                                        validation {
                                                useBearerToken = false (1)
                                                enableAnonymousAccess = true (2)
                                        }
                                        storage {
                                                jwt {
                                                        secret = 'foobar123'*4 (3)
                                                }
                                        }
                                }
                                oauth {
                                        frontendCallbackUrl = { String tokenValue -> "https://:8080/auth/success?token=${tokenValue}" } (4)
                                        google {
                                                client = org.pac4j.oauth.client.Google2Client (5)
                                                key = '${GOOGLE_KEY}' (6)
                                                secret = '${GOOGLE_SECRET}' (7)
                                                scope = org.pac4j.oauth.client.Google2Client.Google2Scope.EMAIL_AND_PROFILE (8)
                                                defaultRoles = [] (9)
                                        }
                                }
                        }
                        providerNames = ['anonymousAuthenticationProvider'] (10)
                }
        }
}| 1 | 为了注册您自己的 tokenReader 实现,您必须停用载体令牌支持。 |
| 2 | 对应用 Grails Spring Security Rest 插件过滤器的 URL 启用匿名访问 |
| 3 | 用于对 JWT 令牌签名的必需密钥。 |
| 4 | 回调 URL,在选择 Google 用户后,将调用此回调 URL,提供用于对用户进行验证的 JWT 令牌 |
| 5 | 需使用哪个 pac4j 客户端,此处为 Google 客户端 |
| 6 | 打开您在设置 Google 时下载的 client_id.json。当您启动应用时,您将提供 client_id 作为系统属性 GOOGLE_KEY。 |
| 7 | 打开您在设置 Google 时下载的 client_id.json。当您启动应用时,您将提供 client_secret 作为系统属性 GOOGLE_KEY。 |
| 8 | 范围可以是枚举 org.pac4j.oauth.client.Google2Client.Google2Scope 的任何值 |
| 9 | Google 身份验证允许访问的特定角色 |
| 10 | 我们将仅针对 Google 对我们的用户进行身份验证。因此,我们仅使用匿名身份验证提供程序。在 Spring Security Core 插件文档中详细了解 身份验证提供程序。 |
若要启动应用,您需要提供 client_id 和 client_secret 作为 system properties。例如:
`./gradlew -DGOOGLE_KEY=XXXXXX -DGOOGLE_SECRET=XXXX bootRun
| 虽然该范围可以是枚举 org.pac4j.oauth.client.Google2Client.Google2Scope 的任何值,但如果您使用默认的 OauthUserDetailsService,则需要使用 EMAIL_AND_PROFILE。这是因为默认实现使用个人资料 ID 作为用户名,而 Google 仅在使用 EMAIL_AND_PROFILE 范围时返回个人资料 ID。 |
我们希望我们应用默认情况下为无状态,并允许匿名访问一些端点。
String ANONYMOUS_FILTERS = 'anonymousAuthenticationFilter,restTokenValidationFilter,restExceptionTranslationFilter,filterInvocationInterceptor' (1)
grails.plugin.springsecurity.filterChain.chainMap = [
                [pattern: '/dbconsole/**',      filters: 'none'],
                [pattern: '/assets/**',      filters: 'none'],
                [pattern: '/**/js/**',       filters: 'none'],
                [pattern: '/**/css/**',      filters: 'none'],
                [pattern: '/**/images/**',   filters: 'none'],
                [pattern: '/**/favicon.ico', filters: 'none'],
                [pattern: '/', filters: ANONYMOUS_FILTERS], (1)
                [pattern: '/book/show/*', filters: ANONYMOUS_FILTERS],  (1)
                [pattern: '/bookFavourite/index', filters: ANONYMOUS_FILTERS], (1)
                [pattern: '/auth/success', filters: ANONYMOUS_FILTERS], (1)
                [pattern: '/oauth/authenticate/google', filters: ANONYMOUS_FILTERS], (1)
                [pattern: '/oauth/callback/google', filters: ANONYMOUS_FILTERS], (1)
                [pattern: '/**', filters: 'JOINED_FILTERS,-anonymousAuthenticationFilter,-exceptionTranslationFilter,-authenticationProcessingFilter,-securityContextPersistenceFilter,-rememberMeAuthenticationFilter'],  (1)
]| 1 | 当未发送令牌时允许匿名访问的无状态链。但是,如果请求中有令牌,将对其进行验证。 |
| 2 | /** 是不允许匿名访问的无状态链。因此,将始终需要令牌,如果缺少令牌,将向客户端发送错误请求响应。 |
我们不会将用户信息保存在数据库中。您可能已注意到我们在项目中没有 User、Role、UserRole 域类。我们也没有设置 userLookUp.userDomainClass 等配置值。 |
现在我们覆盖 login/auth 视图。因此,我们不再在该页面中显示用户名/密码表单。
<html>
<head>
    <meta name="layout" content="${gspLayout ?: 'main'}"/>
    <title><g:message code='springSecurity.login.title'/></title>
</head>

<body>
<div id="login">
    <div class="inner centered" >
        <div class="fheader"><g:message code='springSecurity.login.header'/></div>
        <g:if test='${flash.message}'>
            <div class="login_message">${flash.message}</div>
        </g:if>
    </div>
</div>
</body>
</html>
我们在该页面中不含“用 Google 登录”按钮,因为我们在根布局main.gsp文件中已包含该按钮。
3.4 注销处理程序
Spring Security 允许注册自定义 注销处理程序。注册新的注销处理程序以清除 JWT cookie。我们重复使用 Spring Security 附带的 CookieClearingLogoutHandler。
修改 grails-app/conf/spring/resources.groovy
import org.springframework.security.web.authentication.logout.CookieClearingLogoutHandler
beans {
...
..
.
    cookieClearingLogoutHandler(CookieClearingLogoutHandler, ['jwt'])
}
将自定义注销处理程序添加到 Spring Security 核心插件 logout.handlerNames。
grails.plugin.springsecurity.logout.handlerNames = ['rememberMeServices', 'securityContextLogoutHandler', 'cookieClearingLogoutHandler']3.5 JWT Cookie
创建 AuthController.groovy。当用户使用 Google 成功登录时,将调用 AuthController.success。
AuthController.success 的路径在 application.groovy 中的 frontendCallbackUrl 中使用。 |
package demo

import grails.config.Config
import grails.core.support.GrailsConfigurationAware
import grails.plugin.springsecurity.annotation.Secured
import grails.plugin.springsecurity.rest.token.reader.TokenReader
import groovy.util.logging.Slf4j

import javax.servlet.http.Cookie

@Slf4j
class AuthController implements GrailsConfigurationAware {

    TokenReader tokenReader

    int jwtExpiration

    String grailsServerUrl

    static allowedMethods = [
            success: 'GET',
            logout: 'POST'
    ]

    @Secured('permitAll')
    def success(String token) {
        log.debug('token value {}', token)
        if (token) {
            Cookie cookie = jwtCookie(token)
            response.addCookie(cookie) (1)
        }
        [grailsServerUrl: grailsServerUrl]
    }

    protected Cookie jwtCookie(String tokenValue) {
        Cookie jwtCookie = new Cookie( cookieName(), tokenValue )
        jwtCookie.maxAge = jwtExpiration (5)
        jwtCookie.path = '/'
        jwtCookie.setHttpOnly(true) (3)
        if ( httpOnly() ) {
            jwtCookie.setSecure(true) (4)
        }
        jwtCookie
    }

    @Override
    void setConfiguration(Config co) {
        jwtExpiration = co.getProperty('grails.plugin.springsecurity.rest.token.storage.memcached.expiration', Integer, 3600) (5)
        grailsServerUrl = co.getProperty('grails.serverURL', String)
    }

    protected boolean httpOnly() {
        grailsServerUrl?.startsWith('https')
    }

    protected String cookieName() {
        if ( tokenReader instanceof JwtCookieTokenReader ) {
            return ((JwtCookieTokenReader) tokenReader).cookieName  (6)
        }
        return 'jwt'
    }
}| 1 | 响应包含 JWT 令牌作为值的 Cookie |
| 2 | 以相同名称和 maxAge 等于 0 响应 Cookie 可删除该 Cookie。因此,它将注销用户。 |
| 3 | 防止在您的站点中执行的任何 Javascript(甚至您自己的 Javascript)执行 document.cookies 和访问 Cookie |
| 4 | 如果您执行 http:// 而不是 https://,Cookie 将不会消失。您应该在生产中使用 https。 |
| 5 | 将 Cookie 过期时间设置为与 JWT 过期时间匹配 |
| 6 | 使用相同的 Cookie 名称,自定义的 tokenReader 在我们之前定义中预期。 |
| 由于本应用程序的安全解决方案的无状态性质。注销用户涉及删除包含其 JWT 令牌的 Cookie。 |
success 操作的 GSP 对主页执行简单的重定向。我们将在客户端中进行重定向,以确保正确设置 Cookie。
<html>
    <head>
        <meta http-equiv="refresh" content="0; url=${grailsServerUrl ?: 'https://:8080'}/" />
        </head>
        <body><g:message code="redirecting" default="Redirecting..."/></body>
</html>
3.6 增强日志记录
如果您希望启用增强日志记录,以便在调用 Google 的 OAuth API 时查看返回的内容,请将以下内容添加到 logback.groovy 文件的末尾
logger("org.springframework.security", DEBUG, ['STDOUT'], false)
logger("grails.plugin.springsecurity", DEBUG, ['STDOUT'], false)
logger("org.pac4j", DEBUG, ['STDOUT'], false)
4 构建您的应用
我们将快速构建一个列出图书并允许我们收藏它们的应用。一旦我们使用 Google 登录,收藏按钮才可用。
4.1 您的领域
对于您的领域,我们需要领域对象 Book 和 BookFavourite。按如下方式创建
package demo

import grails.compiler.GrailsCompileStatic

@GrailsCompileStatic
class Book {
    String image
    String title
    String author
    String about
    String href
    static mapping = {
        image nullable: false
        title nullable: false
        author nullable: false
        about nullable: false
        href nullable: false
        about type: 'text'
    }
}package demo
import grails.compiler.GrailsCompileStatic
@GrailsCompileStatic
class BookFavourite {
Long bookId
String username
static constraints = {
bookId nullable: false
username nullable: false
}
}4.2 您的数据
此时,我们将创建我们的图书数据,以便我们有继续进行的一些内容。继续并将您的 BootStrap.groovy 与以下内容相匹配。
| 所需的图像资源已经添加到初始项目中。 |
package demo
import groovy.transform.CompileStatic
@CompileStatic
class BootStrap {
public final static List< Map<String, String> > GRAILS_BOOKS = [
[
title : 'Grails 3 - Step by Step',
author: 'Cristian Olaru',
href: 'https://grailsthreebook.com/',
about : 'Learn how a complete greenfield application can be implemented quickly and efficiently with Grails 3 using profiles and plugins. Use the sample application that accompanies the book as an example.',
image: 'grails_3_step_by_step.png',
],
[
title : 'Practical Grails 3',
author: ' Eric Helgeson',
href : 'https://www.grails3book.com/',
about : 'Learn the fundamental concepts behind building Grails applications with the first book dedicated to Grails 3. Real, up-to-date code examples are provided, so you can easily follow along.',
image: 'pratical-grails-3-book-cover.png',
],
[
title : 'Falando de Grails',
author: 'Henrique Lobo Weissmann',
href : 'http://www.casadocodigo.com.br/products/livro-grails',
about : 'This is the best reference on Grails 2.5 and 3.0 written in Portuguese. It's a great guide to the framework, dealing with details that many users tend to ignore.',
image: 'grails_weissmann.png',
],
[
title : 'Grails Goodness Notebook',
author: 'Hubert A. Klein Ikkink',
href : 'https://leanpub.com/grails-goodness-notebook',
about : 'Experience the Grails framework through code snippets. Discover (hidden) Grails features through code examples and short articles. The articles and code will get you started quickly and provide deeper insight into Grails.',
image: 'grailsgood.png',
],
[
title : 'The Definitive Guide to Grails 2',
author: 'Jeff Scott Brown and Graeme Rocher',
href : 'http://www.apress.com/9781430243779',
about : 'As the title states, this is the definitive reference on the Grails framework, authored by core members of the development team.',
image: 'grocher_jbrown_cover.jpg',
],
[
title : 'Grails in Action',
author: 'Glen Smith and Peter Ledbrook',
href : 'http://www.manning.com/gsmith2/',
about : 'The second edition of Grails in Action is a comprehensive introduction to Grails 2 focused on helping you become super-productive fast.',
image: 'gsmith2_cover150.jpg',
],
[
title : 'Grails 2: A Quick-Start Guide',
author: 'Dave Klein and Ben Klein',
href : 'http://www.amazon.com/gp/product/1937785777?tag=misa09-20',
about : 'This revised and updated edition shows you how to use Grails by iteratively building a unique, working application.',
image : 'bklein_cover.jpg',
],
[
title : 'Programming Grails',
author: 'Burt Beckwith',
href : 'http://shop.oreilly.com/product/0636920024750.do',
about : 'Dig deeper into Grails architecture and discover how this application framework works its magic.',
image: 'bbeckwith_cover.gif'
]
] as List< Map<String, String> >
public final static List< Map<String, String> > GROOVY_BOOKS = [
[
title: 'Making Java Groovy',
author: 'Ken Kousen',
href: 'http://www.manning.com/kousen/',
about: 'Make Java development easier by adding Groovy. Each chapter focuses on a task Java developers do, like building, testing, or working with databases or restful web services, and shows ways Groovy can make those tasks easier.',
image: 'Kousen-MJG.png',
],
[
title: 'Groovy in Action, 2nd Edition',
author: 'Dierk König, Guillaume Laforge, Paul King, Cédric Champeau, Hamlet D\'Arcy, Erik Pragt, and Jon Skeet',
href: 'http://www.manning.com/koenig2/',
about: 'This is the undisputed, definitive reference on the Groovy language, authored by core members of the development team.',
image: 'regina.png',
],
[
title: 'Groovy for Domain-Specific Languages',
author: 'Fergal Dearle',
href: 'http://www.packtpub.com/groovy-for-domain-specific-languages-dsl/book',
about: 'Learn how Groovy can help Java developers easily build domain-specific languages into their applications.',
image: 'gdsl.jpg',
],
[
title: 'Groovy 2 Cookbook',
author: 'Andrey Adamovitch, Luciano Fiandeso',
href: 'http://www.packtpub.com/groovy-2-cookbook/book',
about: 'This book contains more than 90 recipes that use the powerful features of Groovy 2 to develop solutions to everyday programming challenges.',
image: 'g2cook.jpg',
],
[
title: 'Programming Groovy 2',
author: 'Venkat Subramaniam',
href: 'http://pragprog.com/book/vslg2/programming-groovy-2',
about: 'This book helps experienced Java developers learn to use Groovy 2, from the basics of the language to its latest advances.',
image: 'vslg2.jpg'
],
] as List< Map<String, String> >
BookDataService bookDataService
def init = { servletContext ->
for (Map<String, String> bookInfo : (GRAILS_BOOKS + GROOVY_BOOKS)) {
bookDataService.save(bookInfo.title, bookInfo.author, bookInfo.about, bookInfo.href, bookInfo.image)
}
}
def destroy = {
}
}4.3 您的服务
接下来,我们需要创建我们的服务以返回我们的所有图书和收藏的图书。首先,我们利用数据服务实现我们的基本功能。
package demo

import grails.gorm.services.Service
import grails.gorm.transactions.ReadOnly
import groovy.transform.CompileDynamic
import org.grails.datastore.mapping.query.api.BuildableCriteria
import org.hibernate.transform.Transformers

interface IBookDataService {
    Book save(String title, String author, String about, String href, String image)
    Number count()
    Book findById(Long id)
}

@Service(Book)
abstract class BookDataService implements IBookDataService {

    @CompileDynamic
    @ReadOnly
    List<BookImage> findAll() {
        BuildableCriteria c = Book.createCriteria()
        c.list {
            resultTransformer(Transformers.aliasToBean(BookImage))
            projections {
                property('id', 'id')
                property('image', 'image')
            }
        }
    }

    @CompileDynamic
    @ReadOnly
    List<BookImage> findAllByIds(List<Long> ids) {
        BuildableCriteria c = Book.createCriteria()
        c.list {
            inList('id', ids)
            resultTransformer(Transformers.aliasToBean(BookImage))
            projections {
                property('id', 'id')
                property('image', 'image')
            }
        }
    }
}
为 BookFavourite 领域类 CRUD 操作创建一个 GORM 数据服务。
package demo

import grails.gorm.services.Query
import grails.gorm.services.Service

@Service(BookFavourite)
interface BookFavouriteDataService {

    BookFavourite save(Long bookId, String username)

    @Query("select $b.bookId from ${BookFavourite b} where $b.username = $username") (1)
    List<Long> findBookIdByUsername(String username)
}
4.4 控制器
在完成服务层创建后需要添加控制器。首先,需要提供基本图书控制器,该控制器可以返回所有图书的列表或显示选定的图书。
package demo

import grails.plugin.springsecurity.annotation.Secured
import groovy.transform.CompileStatic

@Secured('permitAll')
@CompileStatic
class BookController {

    static allowedMethods = [index: 'GET', show: 'GET']

    BookDataService bookDataService

    def index() {
        [bookList: bookDataService.findAll()]
    }

    def show(Long id) {
        [bookInstance: bookDataService.findById(id)]
    }

}
然后添加收藏控制器,它可以返回我们收藏的图书列表以及我们操作收藏的图书时执行的操作。
package demo

import grails.plugin.springsecurity.SpringSecurityService
import grails.plugin.springsecurity.annotation.Secured
import groovy.transform.CompileDynamic

class BookFavouriteController {

    static allowedMethods = [
            index: 'GET',
            favourite: 'POST',
    ]

    SpringSecurityService springSecurityService
    BookFavouriteDataService bookFavouriteDataService
    BookDataService bookDataService

    @Secured('permitAll')
    def index() {
        String username = loggedUsername()
        List<Long> bookIds = bookFavouriteDataService.findBookIdByUsername(username) (1)
        List<BookImage> bookList = bookDataService.findAllByIds(bookIds) (2)
        render view: '/book/index', model: [bookList: bookList]
    }

    @Secured('isAuthenticated()')
    def favourite(Long bookId) {
        String username = loggedUsername()
        bookFavouriteDataService.save(bookId, username) (3)
        redirect(action: 'index')
    }

    @CompileDynamic
    protected String loggedUsername() {
        springSecurityService.principal.username
    }

}| 1 | 调用自定义收藏图书查找器 |
| 2 | 调用自定义 findAll |
| 3 | 调用操作保存收藏 |
4.5 视图
我们终于准备好了通过一个功能性界面连接所有元素。首先,为 views/book 中列出的图书创建一个索引页,以便查看图书列表。
<html>
<head>
    <title>Groovy & Grails Books</title>
    <meta name="layout" content="main" />
</head>
<body>
<div id="content" role="main">
    <section class="row colset-2-its">
        <g:each in="${bookList}" var="${book}">
            <g:link controller="book" id="${book.id}" action="show">
                <asset:image src="${book.image}" width="200" />
            </g:link>
        </g:each>
    </section>
</div>
</body>
</html>
接下来,在 views/books 中创建 show.gsp,以便在选择图书后可以查看其详细信息。
<html>
<head>
    <title>${bookInstance?.title}</title>
    <meta name="layout" content="main" />
</head>
<body>
<div id="content" role="main">
    <section class="row colset-2-its">
        <g:if test="${bookInstance}">
            <h1><a href="${bookInstance.href}">${bookInstance.title}</a></h1>
            <sec:ifLoggedIn>
                <g:form controller="bookFavourite" action="favourite">
                    <g:hiddenField name="bookId" value="${bookInstance.id}"/>
                    <input type="submit" class="btn btn-default" value="${g.message(code: 'book.favourite', default: 'Favourite')}"/>
                </g:form>
            </sec:ifLoggedIn>
            <p>${bookInstance.about}</p>
            <h2><g:message code="book.author" args="[bookInstance.author]" default="By {0}"/></h2>
            <asset:image src="${bookInstance.image}" width="200" />
        </g:if>
    </section>
</div>
</body>
</html>
在上面的代码中,我们用登录检查包装了收藏按钮,因为只有在登录时才能收藏图书
最后,在布局文件中通过添加一个简单的菜单来绑定所有元素,该菜单允许选择所有图书、收藏图书或登录/退出。我们把它添加到导航 div 和 <g:layoutBody/> 之间。
<div class="centered" style="margin: 10px auto;">
    <g:link controller="book" action="index">
        <g:message code="book.all" default="All"/>
    </g:link>
    <span>|</span>
    <g:link controller="bookFavourite" action="index">
        <g:message code="book.favourite" default="Favourites"/>
    </g:link>
    <span>|</span>
    <sec:ifNotLoggedIn>
        <g:render template="/auth/loginWithGoogle"/>
    </sec:ifNotLoggedIn>
    <sec:ifLoggedIn>
        <g:form controller="logout" style="display: inline;">
            <input type="submit" value="${g.message(code: "logout", default:"Logout")}"/>
        </g:form>
    </sec:ifLoggedIn>
</div>

<g:if test="${flash.message}">
    <div class="message" style="display: block">${flash.message}</div>
</g:if>
在上面的代码中,我们
-
使菜单居中;链接到所有图书列表;链接到收藏图书列表,使用 Google 登录/退出
-
包含带有登录链接的模板
-
包含带有退出链接的模板
-
添加一个消息块,以便我们可以查看登录/退出消息
我们创建一个模板来包含链接,通过 Google 触发我们的 OAuth 登录;链接 /oauth/authenticate 由 spring-security-rest 插件提供,并以 /google(用于链接 /oauth/authenticate/google 的提供程序)结尾。这会将你重定向到 Google 的正常登录/帐号选择界面,你对此已经很熟悉。
<a href="/oauth/authenticate/google">
    <asset:image src="[email protected]"
                 alt="${g.message(code: "login.google", default:"Login with Google")}" height="40"/>
</a>
资产中已为你提供了 [email protected] |
5 运行已完成的应用
使用 Gradle bootRun 任务运行该应用。
$ ./gradlew bootRun与之前一样。现在,我们的应用正在运行,请导航至 https://:8080 查看以下内容。
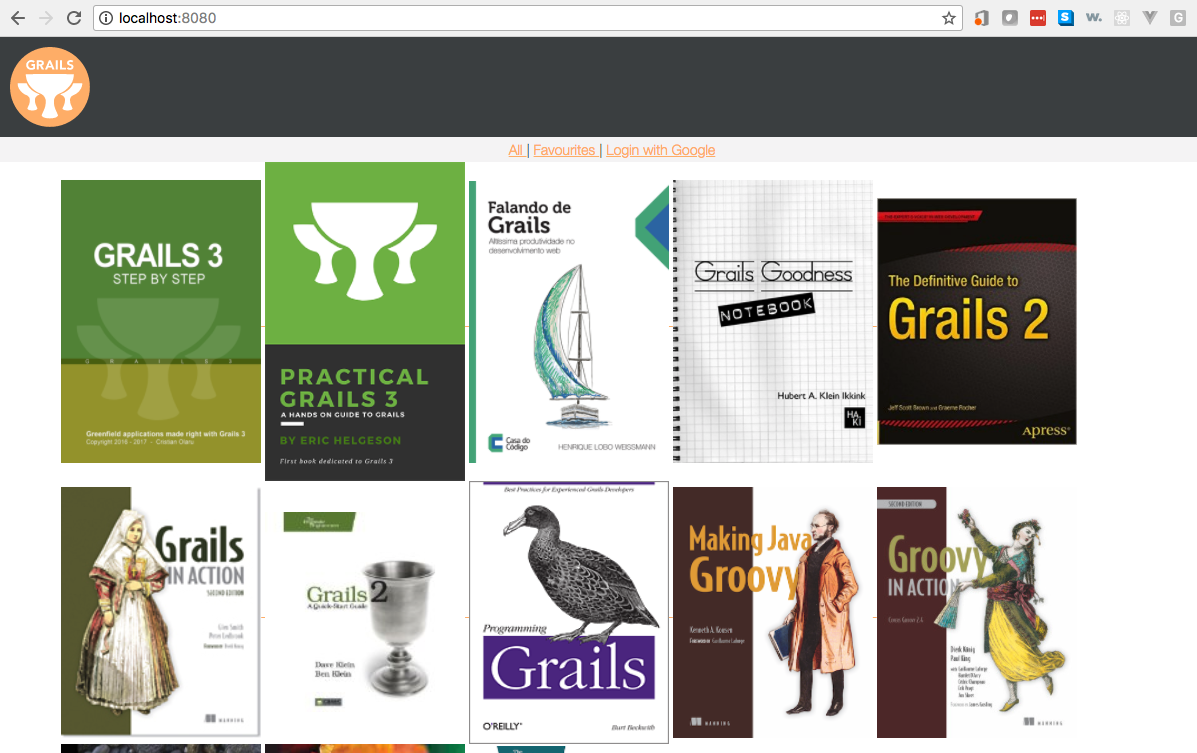
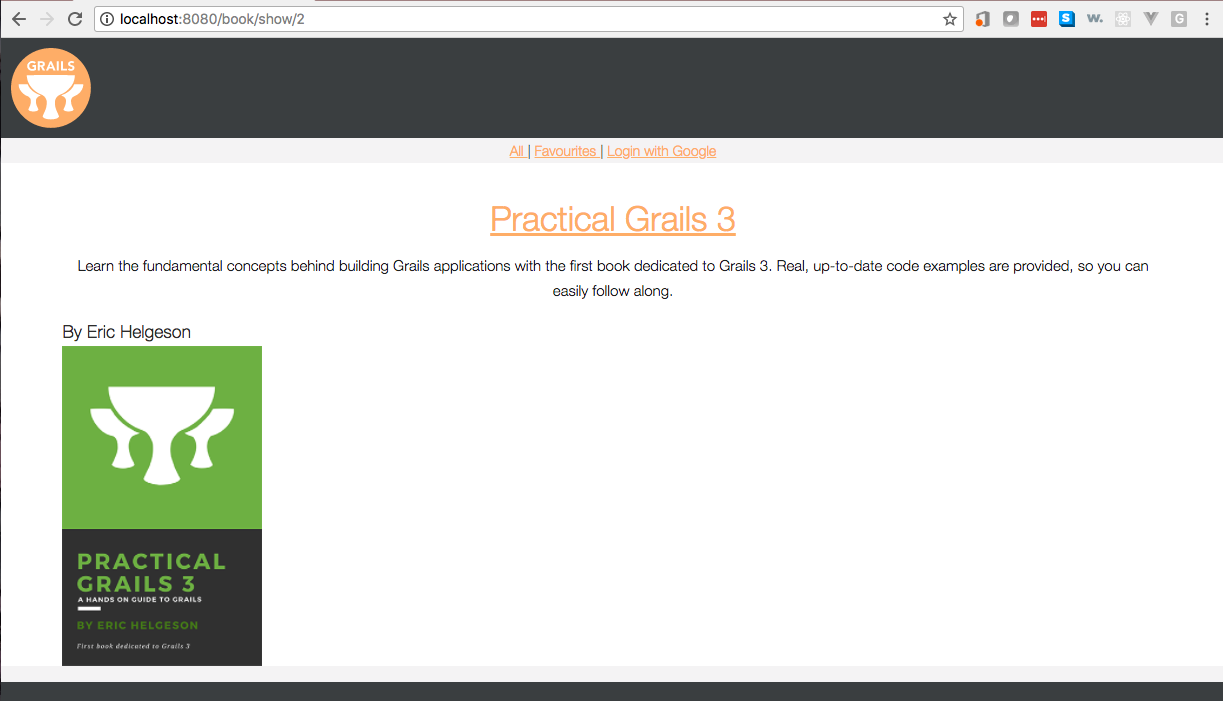
选择一本书,并查看在未登录时没有可用的 收藏 按钮。
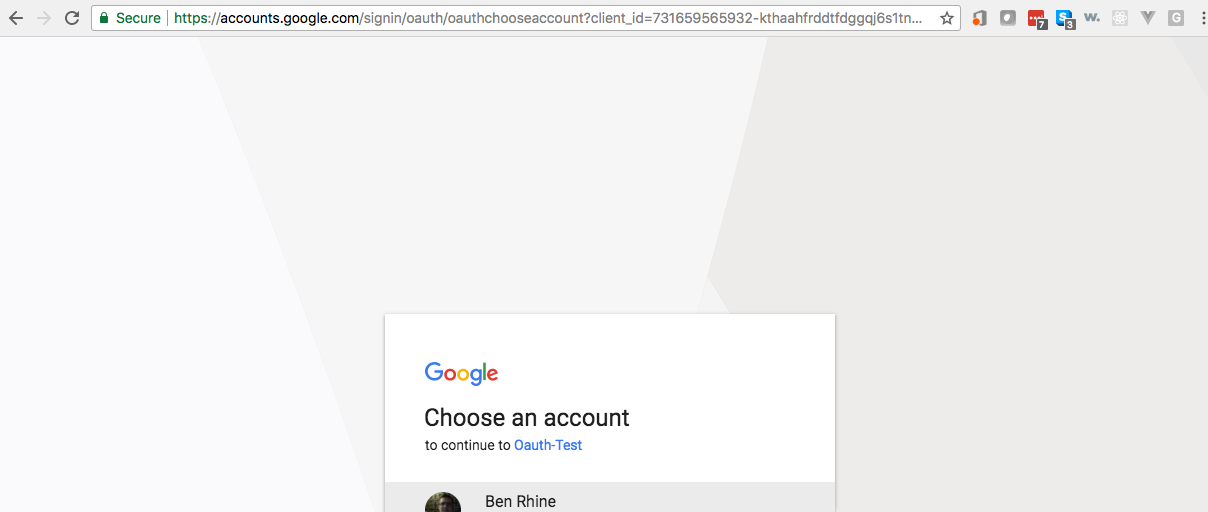
从我们的菜单中点击 使用 Google 登录,然后选择帐号/登录
查看我们的成功登录消息
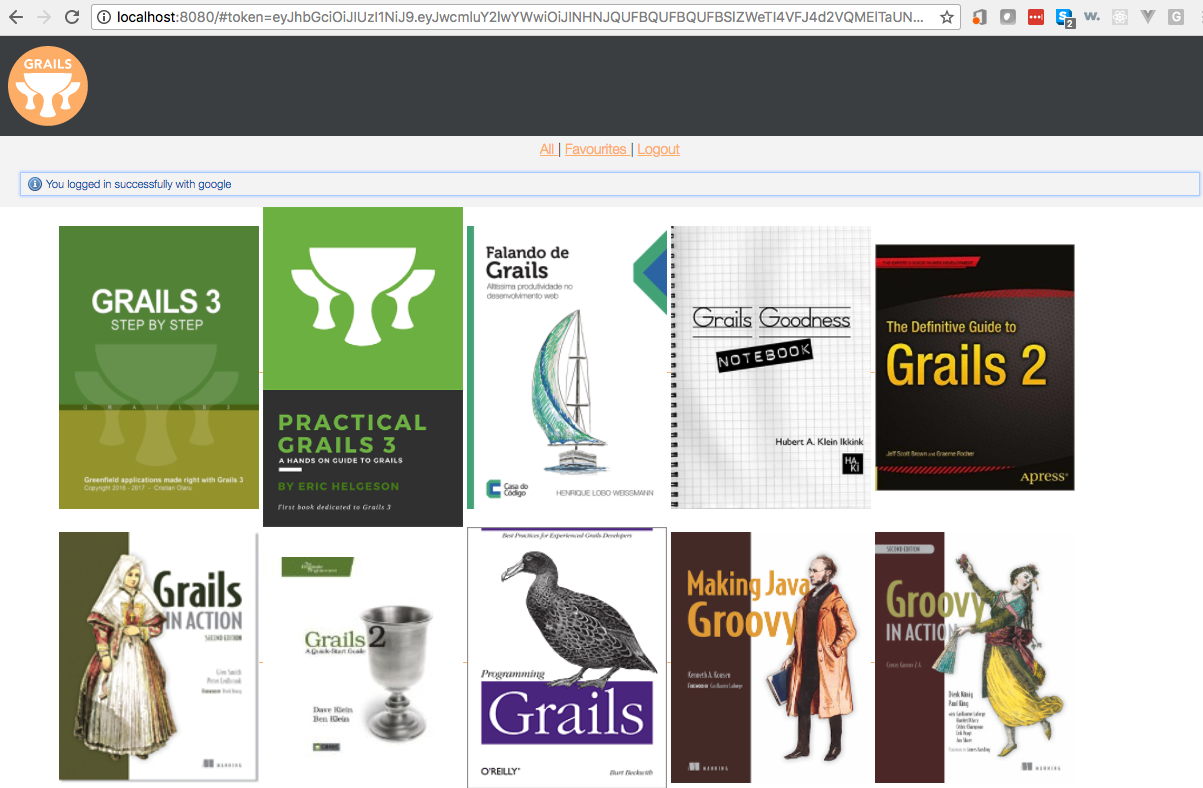
选择一本书,并查看 收藏 按钮现在可用。
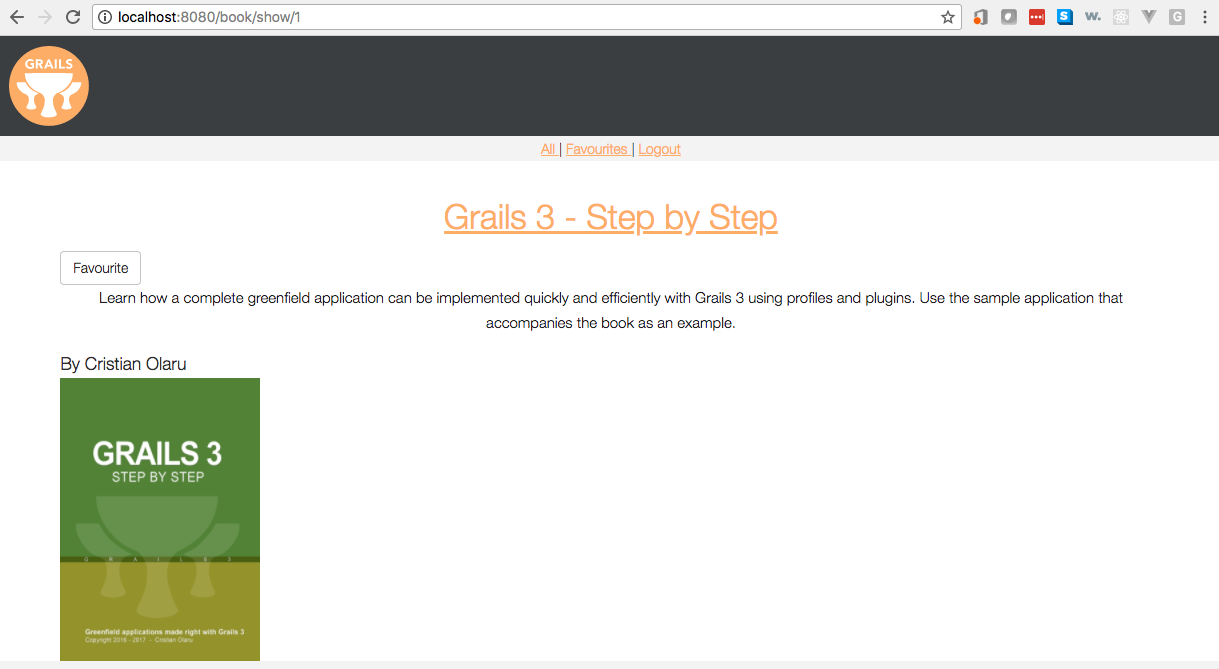
点击退出,你将看到我们的退出消息显示出来。

6 后续步骤
若要深入了解,请仔细阅读 Grails Spring Security Rest 和 Spring Security Core 文档。
