使用 GORM 构建 Spring Boot 应用程序
了解如何使用 GORM 构建 Spring Boot 应用程序
作者:Ben Rhine、Sergio del Amo
Grails 版本:N/A - Spring Boot 版本:2.2
1 Grails 培训
Grails 培训 - 由创建并积极维护 Grails 框架的人员开发和提供!
2 开始使用
在本指南中,你将使用 GORM 构建 Spring Boot 应用程序。
2.1 你需要什么
要完成本指南,你需要以下内容
-
一些时间
-
一个不错的文本编辑器或 IDE
-
已安装的 JDK 1.8 或更高版本,且已正确配置了
JAVA_HOME
2.2 如何完成指南
要开始,请执行以下操作
-
下载并解压缩源代码
或
-
克隆 Git 存储库
git clone https://github.com/grails-guides/gorm-without-grails.git
Grails 指南存储库包含两个文件夹
-
initial初始项目。通常是一个简单的 Grails 应用程序,其中包含一些其他代码,让你可以快速上手。 -
complete已完成示例。这是完成指南中提出的步骤并在初始文件夹中应用这些更改后的结果。
要完成该指南,请转至 initial 文件夹
-
cd进入grails-guides/gorm-without-grails/initial
并按照下一部分中的说明进行操作。
如果你 cd 进入 grails-guides/gorm-without-grails/complete,就可以直接转到完成的示例 |
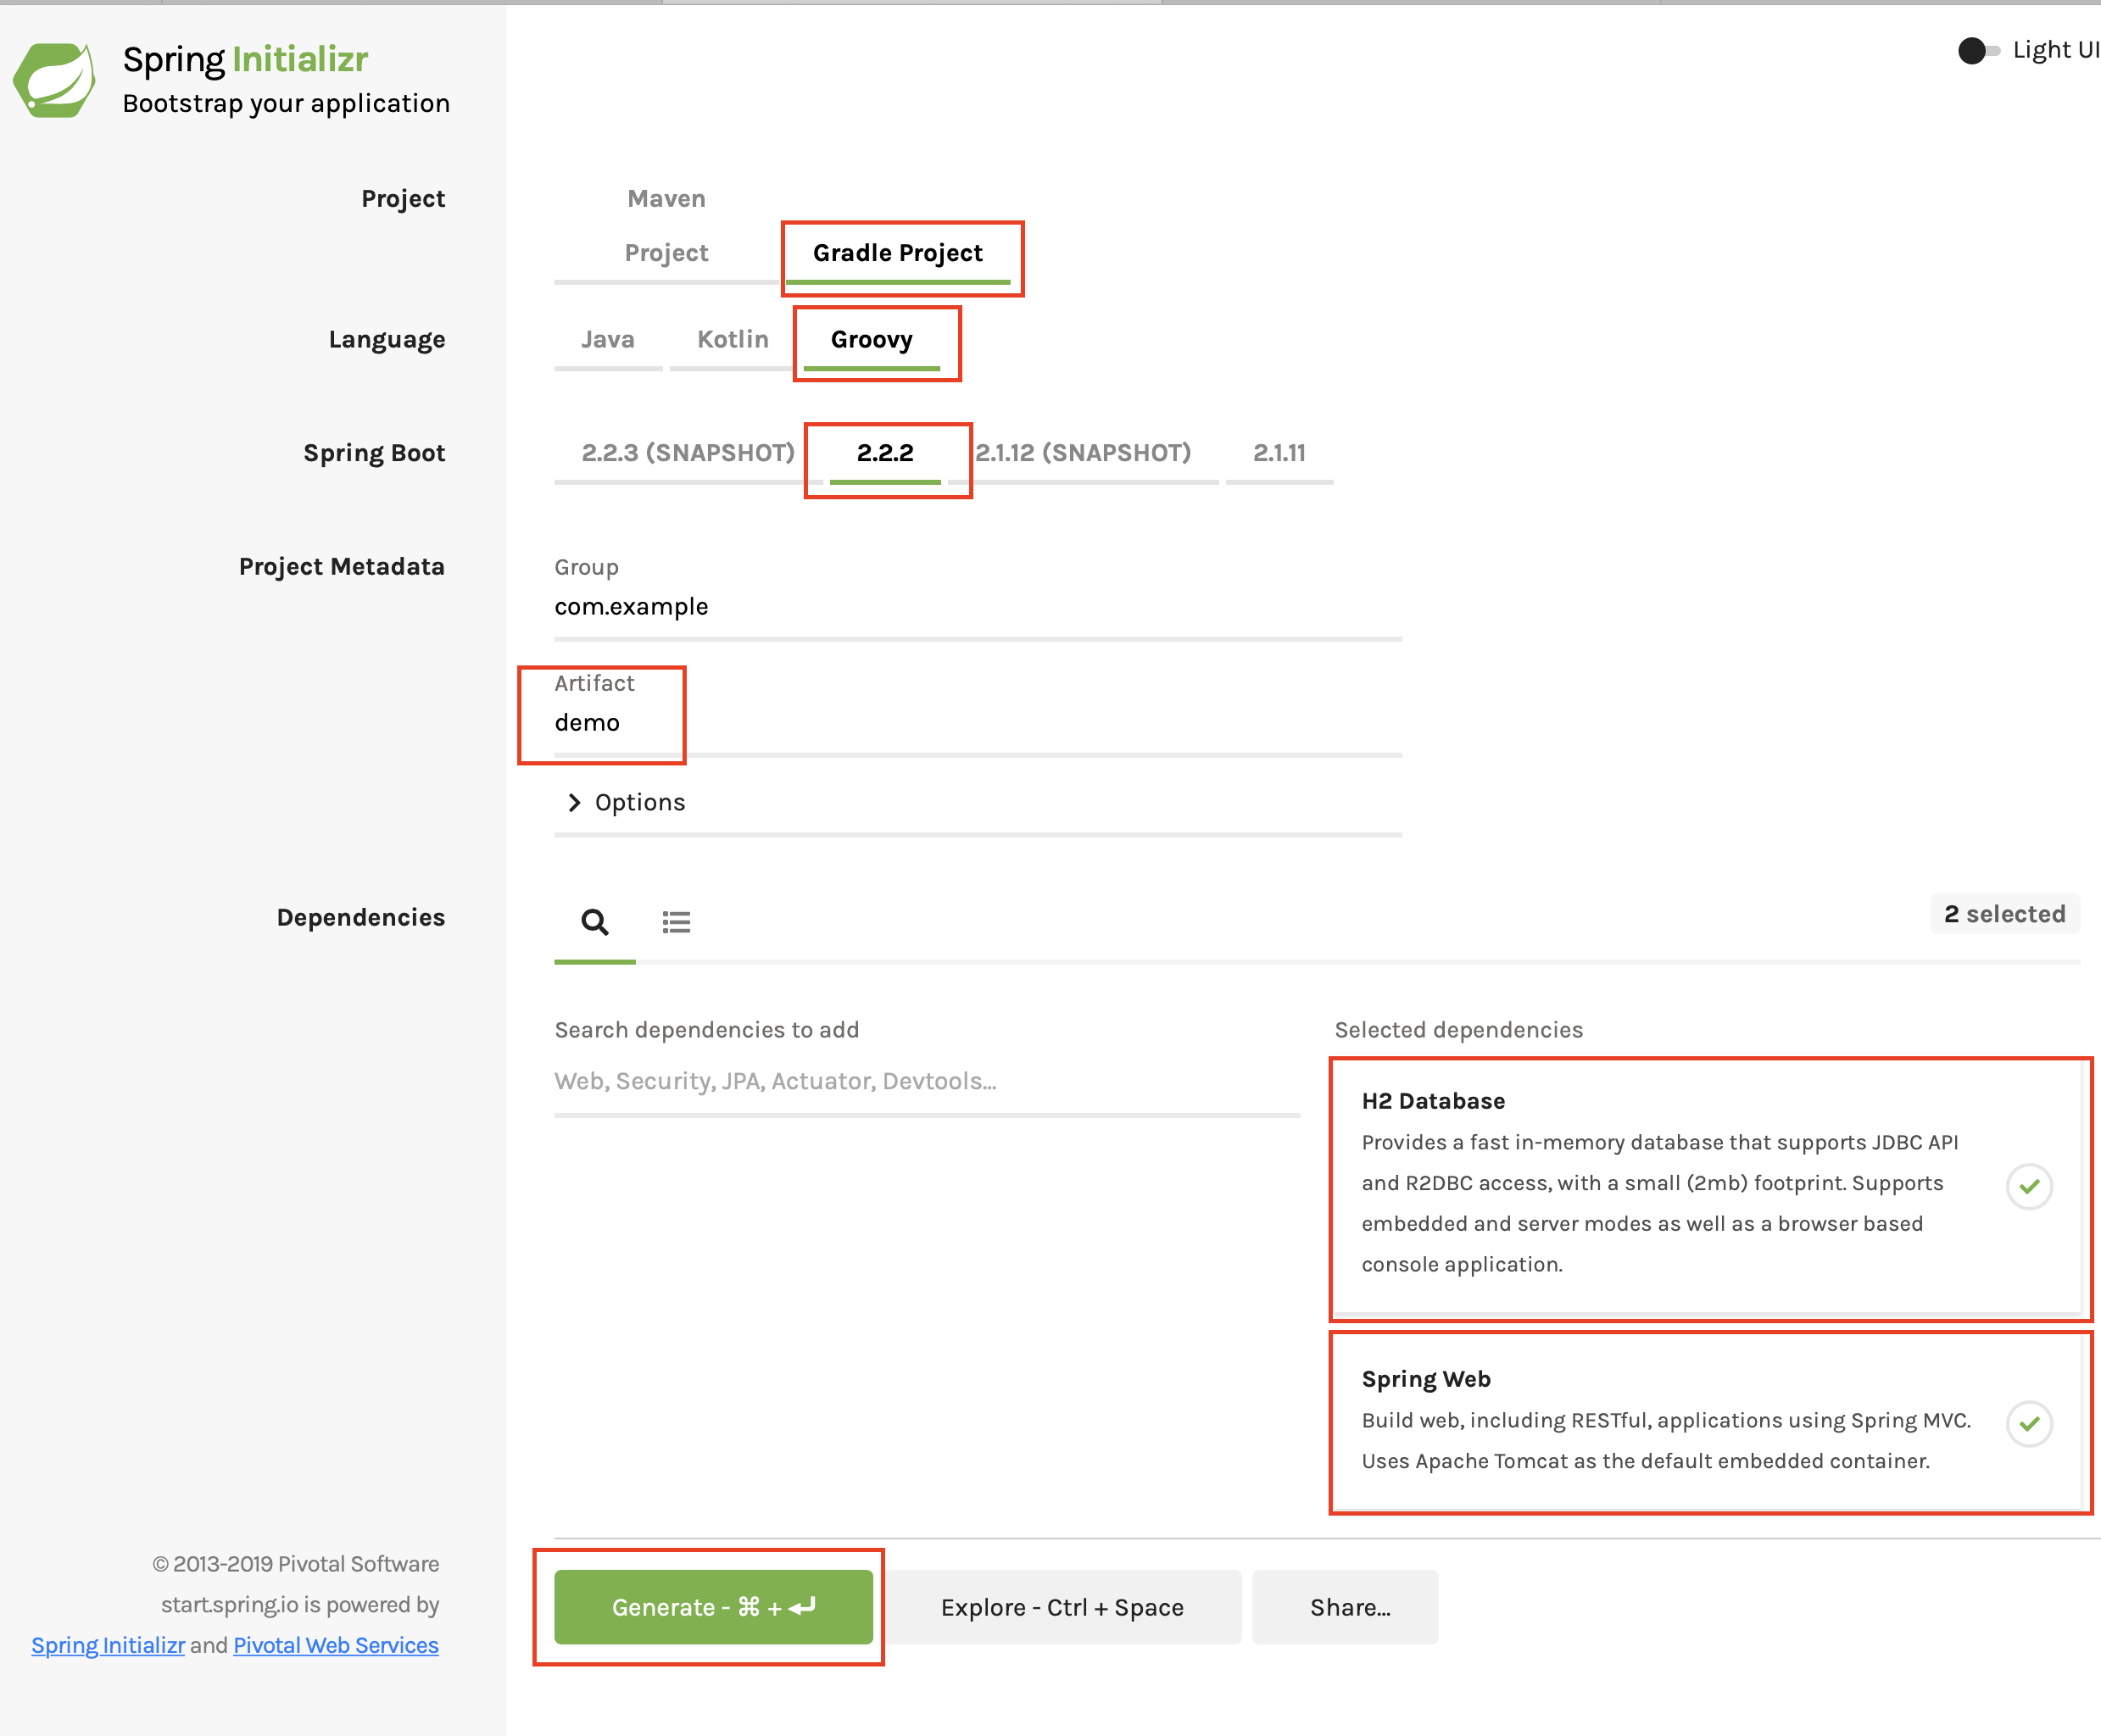
如果您想从头开始,请使用 Spring Initializr 创建一个新的 Spring Boot 应用程序。
使用 Groovy 语言选择一个 Gradle 项目,然后使用 Spring Boot 1.5.6。在选择好构建和项目类型后,将 Group 设置为您的组织,比如 com.example,在我们的示例中我们将使用 demo。
完成后,将 Web 和 h2 依赖项添加到项目中。

单击 生成项目。
3 配置您的构建
编辑 build.gradle 文件以包含 GORM 依赖项。
plugins {
        id 'org.springframework.boot' version '2.2.2.RELEASE'
        id 'io.spring.dependency-management' version '1.0.8.RELEASE'
        id 'groovy'
}

group = 'com.example'
version = '0.0.1-SNAPSHOT'
sourceCompatibility = '1.8'

repositories {
        mavenCentral()
        maven { url "https://repo.grails.org/grails/core" } (1)
}

dependencies {
        implementation 'org.springframework.boot:spring-boot-starter-web'
        implementation 'org.codehaus.groovy:groovy'

        (2)
        implementation("org.grails:gorm-hibernate5-spring-boot:7.0.1.RELEASE")
        implementation "org.hibernate:hibernate-core"
        implementation "org.hibernate:hibernate-ehcache"

        (3)
        runtime "org.apache.tomcat:tomcat-jdbc:8.5.0"
        runtime "org.apache.tomcat.embed:tomcat-embed-logging-log4j:8.5.0"

        runtimeOnly 'com.h2database:h2'
        testImplementation('org.springframework.boot:spring-boot-starter-test') {
                exclude group: 'org.junit.vintage', module: 'junit-vintage-engine'
        }

        testImplementation "org.springframework.boot:spring-boot-starter-webflux" (4)
}

test {
        useJUnitPlatform()
}| 1 | 用于解决 GORM 依赖项的存储库。 |
| 2 | 将 GORM 所需的依赖项添加到我们的项目中。 |
| 3 | 用于连接池 |
| 4 | 要在测试中使用 WebClient,请在您的项目中包含 spring-webflux 模块。 |
3.1 配置
在使用 Spring Boot 时,可使用 src/main/resources/application.yml 文件配置用于 Hibernate 的 GORM。
hibernate:
    hbm2ddl:
        auto: update
    dialect:  org.hibernate.dialect.H2Dialect
spring:
    datasource:
        driverClassName: org.h2.Driver
        url: jdbc:h2:mem:devDb
        username: sa
        password: ""
4 编写应用程序
我们准备创建一个包结构,类似于在 Grails 应用程序中找到的结构。
-
demo.controller
-
demo.domain
-
demo.service
-
demo.init
4.1 创建域
现在,有了我们的包,让我们继续创建我们的域对象。
-
Manufacturer.groovy
-
Vehicle.groovy
您可以使用自己喜欢的 IDE 创建这些对象或执行以下操作
$ cd complete/src/main/groovy/demo/domain/
$ touch Manufacturer.groovy
$ touch Vehicle.groovy
现在,我们的所有类存根都已准备就绪,让我们继续编辑它们。
package demo.domain

import grails.gorm.annotation.Entity
import groovy.transform.ToString
import org.grails.datastore.gorm.GormEntity

@ToString
@Entity
class Manufacturer implements GormEntity<Manufacturer> {

    String name

    static hasMany = [vehicles: Vehicle]

    static constraints = {
        name blank: false
    }
}package demo.domain
import grails.gorm.annotation.Entity
import org.grails.datastore.gorm.GormEntity
import groovy.transform.ToString
@ToString
@Entity
class Vehicle implements GormEntity<Vehicle> {
String name
Integer year
static belongsTo = [manufacturer: Manufacturer]
static constraints = {
name nullable: false, blank: false
}
}Manufacturer 和 Vehicle 具有多对一关系。
我们正在 Grails 外部使用 GORM。因此,我们需要用 grails.gorm.annotation.Entity 为我们的域类添加注释。此外,我们还实现了 GormEntity 特征。它只是在 Grails 外部为 GORM 提供 IDE 支持。
4.2 种子数据
应用程序启动时,我们会保存一些数据。
package demo

import org.springframework.boot.ApplicationArguments
import demo.init.BootStrap
import groovy.transform.CompileStatic
import org.springframework.beans.factory.annotation.Autowired
import org.springframework.boot.ApplicationRunner
import org.springframework.boot.SpringApplication
import org.springframework.boot.autoconfigure.SpringBootApplication
import org.springframework.boot.autoconfigure.orm.jpa.HibernateJpaAutoConfiguration

@CompileStatic
@SpringBootApplication(exclude = HibernateJpaAutoConfiguration.class) (1)
class Application implements ApplicationRunner {

    @Autowired
    BootStrap bootStrap

    static void main(String[] args) {
        SpringApplication.run Application, args
    }

    void run(ApplicationArguments args) throws Exception {
        bootStrap.init()
    }
}| 1 | 禁用 Hibernate JPA 的自动配置。 |
package demo.init

import demo.domain.Manufacturer
import demo.domain.Vehicle
import demo.service.ManufacturerService
import grails.gorm.transactions.Transactional
import groovy.transform.CompileStatic
import org.springframework.beans.factory.annotation.Autowired
import org.springframework.stereotype.Component

@Component
@CompileStatic
class BootStrap {

    @Autowired
    ManufacturerService manufacturerService

    @Transactional
    void init() {
        Manufacturer audi = new Manufacturer(name: 'audi')
        audi.addToVehicles(new Vehicle(name: 'A3', year: 1996))
        audi.addToVehicles(new Vehicle(name: 'A4', year: 1994))
        manufacturerService.save(audi)

        Manufacturer ford = new Manufacturer(name: 'ford')
        ford.addToVehicles(new Vehicle(name: 'Ford KA', year: 1996))
        manufacturerService.save(ford)
    }
}
4.3 创建服务层
接下来,为我们的应用程序创建服务层。
  $ cd src/main/groovy/demo/service
  $ touch ManufacturerService
  $ touch VehicleService
我们将使用 GORM Data Services。
Data Services 通过使用 GORM 逻辑自动实现抽象类或接口的能力,消除了实现服务层逻辑的工作。
package demo.service

import demo.domain.Manufacturer
import grails.gorm.transactions.ReadOnly
import grails.gorm.transactions.Transactional
import groovy.transform.CompileStatic
import org.springframework.stereotype.Service

@CompileStatic
@grails.gorm.services.Service(Manufacturer)
@Service
interface ManufacturerService {

    List<Manufacturer> findAll()

    Manufacturer save(Manufacturer manufacturer)
}package demo.service
import demo.domain.Manufacturer
import demo.domain.Vehicle
import grails.gorm.services.Where
import groovy.transform.CompileStatic
import org.springframework.stereotype.Service
@CompileStatic
@grails.gorm.services.Service(Vehicle)
@Service
interface VehicleService {
@Where({ manufacturer.name == manufacturerName })
List<Vehicle> findAllByManufacturer(String manufacturerName)
}4.4 创建控制器
最后,让我们创建一些控制器,以便我们可以通过基本 UI 访问我们的数据。
  $ cd src/main/groovy/demo/controller
  $ touch ManufacturerController
  $ touch VehicleController
现在,让我们编辑 src/main/groovy/demo/controller 下的控制器。
控制器将拥有以下注释
-
@RestController- 表示控制器 restful,并且可以通过 url 返回数据 -
@Autowired- 允许我们使用依赖注入来访问我们的服务 -
@RequestMapping("/")- 为方法设置 URL 映射
package demo.controller

import demo.service.VehicleService
import org.springframework.beans.factory.annotation.Autowired
import org.springframework.web.bind.annotation.PathVariable
import org.springframework.web.bind.annotation.RequestMapping
import org.springframework.web.bind.annotation.RestController

@RestController
class VehicleController {

    @Autowired VehicleService vehicleService

    @RequestMapping("/{manufacturerName}/vehicles")
    List<String> vehiclesByManufacturer(@PathVariable String manufacturerName) {
        vehicleService.findAllByManufacturer(manufacturerName)*.name
    }
}
添加测试
package demo.controller

import org.junit.jupiter.api.Test
import org.springframework.beans.factory.annotation.Autowired
import org.springframework.boot.test.context.SpringBootTest
import org.springframework.test.web.reactive.server.WebTestClient

@SpringBootTest(webEnvironment = SpringBootTest.WebEnvironment.RANDOM_PORT)
class VehicleControllerTest {

    @Autowired
    WebTestClient webClient

    @Test
    void fetchAudiVehicles() {
        this.webClient.get().uri("/audi/vehicles").exchange().expectBody(String).isEqualTo('["A3","A4"]')
    }
}package demo.controller
import demo.service.ManufacturerService
import org.springframework.beans.factory.annotation.Autowired
import org.springframework.web.bind.annotation.RequestMapping
import org.springframework.web.bind.annotation.RestController
@RestController
class ManufacturerController {
@Autowired
ManufacturerService manufacturerService
@RequestMapping("/")
List<String> index(){
manufacturerService.findAll()*.name
}
}添加测试
package demo.controller

import org.junit.jupiter.api.Test
import org.springframework.beans.factory.annotation.Autowired
import org.springframework.boot.test.context.SpringBootTest
import org.springframework.test.web.reactive.server.WebTestClient

@SpringBootTest(webEnvironment = SpringBootTest.WebEnvironment.RANDOM_PORT)
class ManufacturerControllerTest {

    @Autowired
    WebTestClient webClient

    @Test
    void fetchManufacturer() {
        this.webClient.get().uri("/").exchange().expectBody(String).isEqualTo('["audi","ford"]')
    }
}
运行应用程序
./gradlew bootRun
应该能够调用端点
curl "https://:8080"
并获得相应结果
["audi","ford"]
或获取制造商的车辆
curl "https://:8080/audi/vehicles"
并获得相应结果
["A3","A4"]
